Friday, January 21, 2011

It all started here at Green's Corner in May of last year.

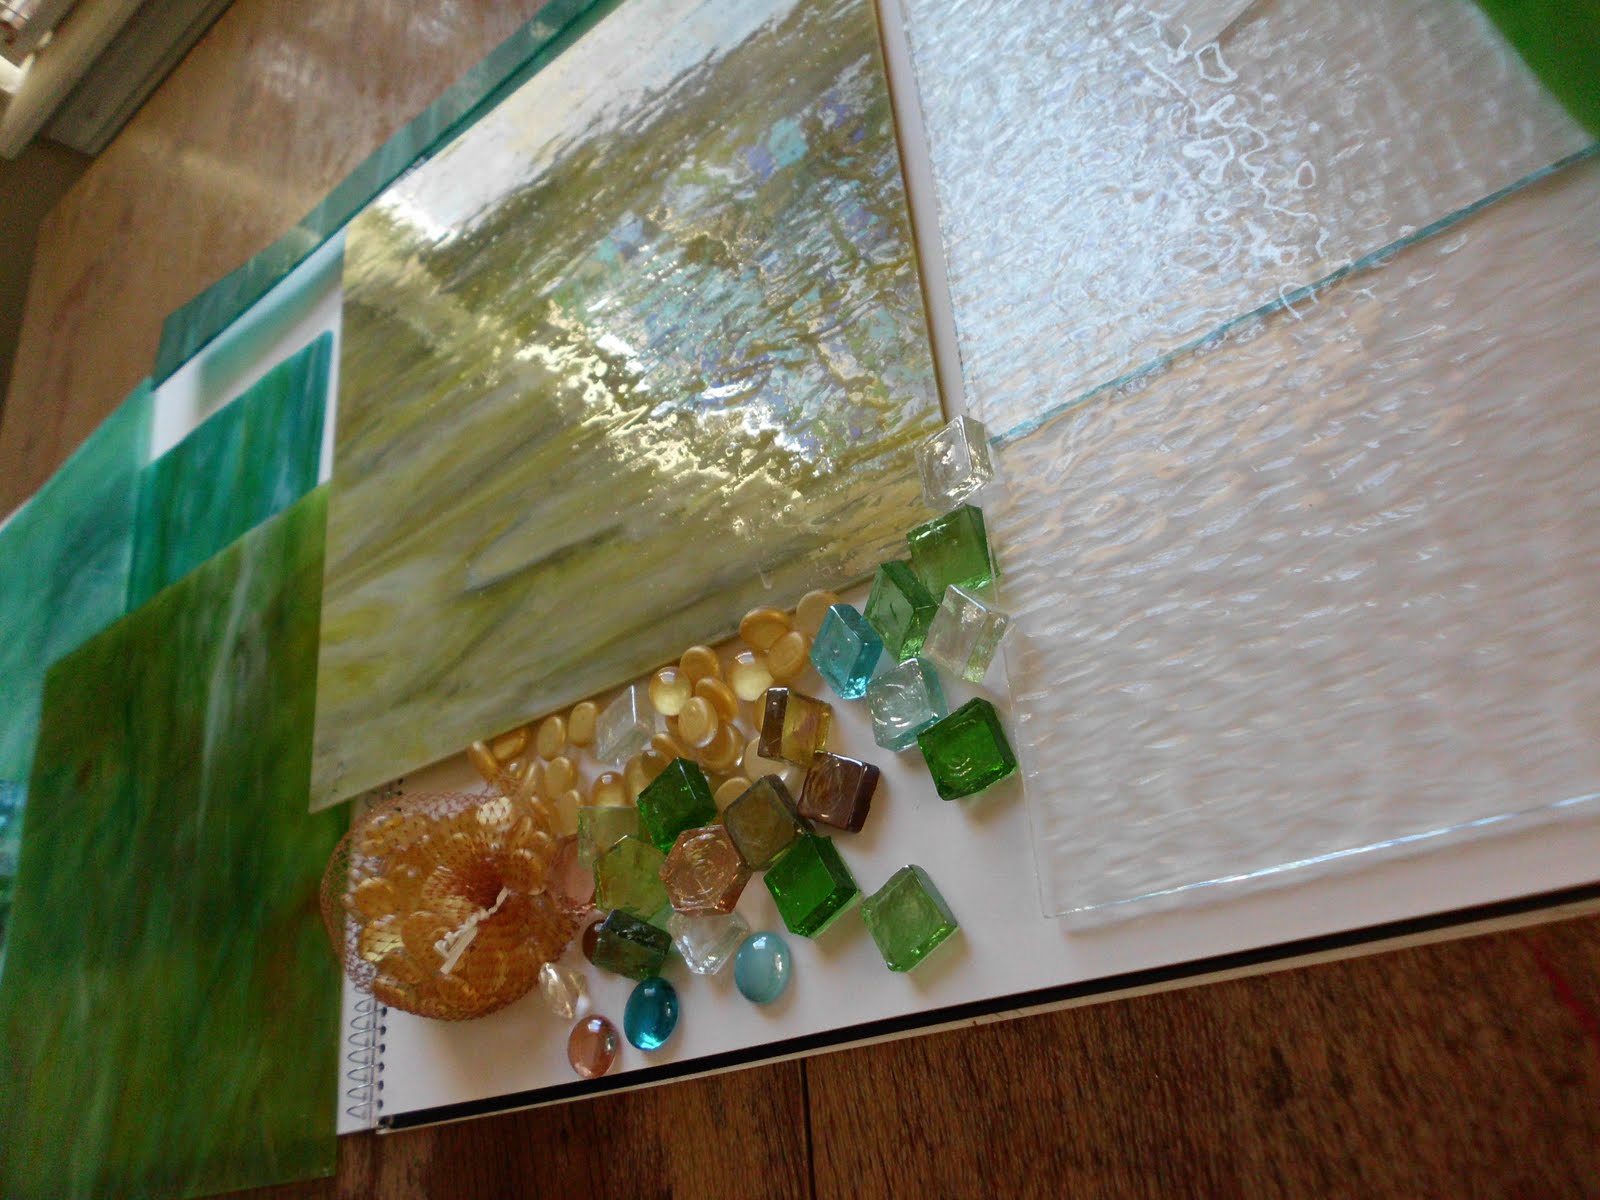
Green's Corner located in Shawnee, Oklahoma is one of my favorite places to shop for "found objects" that I include in my glass art designs. While meandering in one room, I looked up and saw this skull. I liked how his horns had grown and the proportion of his entire head. I imagined him to be feisty and a little wild in his day, maybe even fast and smart. I bought the skull and decided I would make a glass cow skull one day using him as my inspiration.
Nine months later I did. I tried to get as close to the original shape as I could. Below is a photo taken with lights threaded up through the skull. The feather was also the same feather that hung on one of the horns. How did I create this piece? I have included pictures of the process - Enjoy!


Flat glass I used for the skull.

I was in my studio one day and found glass that looked like this. It was a perfect texture and design for glass that I wanted to look like bone. The other pieces of glass I used in the skull besides this glass were lampshades, glass clear gems, glass striped beads, various pieces of scrap clear glass and white flat glass for the back of the design.

Horns and other things.

When I brought the skull home I soaked it overnight. The next day these came off the horns. I didn't know this would happen but it made me feel more hopeful that I could attach these to the glass head since they were hollow.
Some of the supplies I used.

How I foiled the ends of the horns so that I could attach them to the glass skull.


Every piece has been individually foiled and is ready to be soldered....each piece individually. You can see that the basic shape of the skull is complete. I took the real skull and used measurements from it to determine what glass I cut and how I used each piece to make the design in glass.


Starting to come together now....

Can you see how the panel of white glass has been added to the back of the skull now?
I didn't like how blunt and square the glass panel looked at the bottom of the glass skull.

So I added some pieces of glass that came from the edge of a vase down at the bottom of the piece. Having the edges come to a point made more sense to me and looked more realistic.


All I did from this point on was to add pieces to the design to complete the skull shape. I had to remember that his head needed to be thickest at the top and become narrower at the bottom. I knew the pieces could be angled and unbalanced a little because they were resembling broken bone. I put glass gems in places for accent and flow of the design. Next - was getting the horns soldered in.


Looking good!

What a pretty skull.


I laid my needle nose pliers next to the design so you can see how large it is. It is life size.


Done! I have no pictures of when/how the horns were attached - I guess it was just too intense of a process to break my focus and stop to take photos.
I secured them in the design by soldering the ends of the two horns to one long rectangled shaped glass piece. I had lots of space to maneuver the horns in and out of the skull to find the right position and also find out how many other places I could solder them to the skull for secure placement.
So if you were to imagine it - behind the top front of the skull and flowers ran one single band of glass shaped like a thin rectangle which helped to bond both ends of the horns together. Once I slipped them through the holes, I soldered them to the outside edges of the design.

Finished!


Hanging on the wall. I included open slots in the back where you can hang the skull by three nails. This is in addition to the leather strap at the top. Four places that hold the weight of the skull. I do not know the weight - but assuming it is seven to ten pounds.

Another angle.


The other side.


Took a photo with another painting and my stationary bike so you can see the size of the skull in relation to other things.


With lights....


I strung a string of clear lights up into the skull. This gives you the idea of what it looks like with lights inside
I am planning to get a battery or micro-chip powered dome light that I cane feed up through the bottom and attach up inside the widest part of the skull.

The lights intensify the images found in the glass and lampshades. I took a paintbrush and painted a black patina over all the solder lines to give an antique look.

The nodules that resemble the dark eye sockets in the skull came from Missouri. Georgia O'Keeffe is a favorite artist of mine. She painted lots of skulls and included flowers in the design. I was inspired by this and added it to my cow skull.


Just beautiful! I fell blessed to have been a part of creating this.


"We Care for the Earth" Mural - finally finished!

This is Jay, a Respect Diversity volunteer - doing his "Vanna White" impersonation to show off the beautiful "We Care for the Earth" mural.
This mural was painted by pre-kindergarten through twelfth grade students under the guidance of professional artists during the first week of November. The project was lead by Joan Korenblit, Executive Director of the Respect Diversity Foundation.
"We Care for the Earth" mural was painted in honor of the Tenth Annual Respect Diversity Symbol Exhibit that will be held March 11-May 11, 2011. Young people are celebrating diversity in creative ways as they explore issues of cultural diversity, human right, the environment and global peace through the arts.
I was able to participate in this cool event by attending a brainstorming session at the Science Museum and submitted sketches for the initial ideas and designs for the mural. I got to spend time with Amanda Joy Wells who helped create the design - featuring shapes and colors inspired by Peter Max.

"We Care for the Earth" Mural spanned two large walls in the Oklahoma Science Museum

One of my goals is to learn to paint a mural. I am also an advocate of cultural diversity and preserving "Mother Earth". I like the feeling of being a part of something that draws all kinds of folks together for a good cause - synergy!!!


This is Joan, in the pink sweater. What a dynamic person she is! The event was sponsored in part by the Respect Diversity Foundation, Loves, MetroFamily Magazine, ONG, the Oklahoman, the Jewish Foundation and Jewish Federation of Greater Oklahoma City, Lowes, Starbucks, Walmart Stores, Mohamed Christian Goldberg, Science Museum Oklahoma, I Celebrate Diversity.com and Cimarron Alliance.


For more information check this web site:

Donated to the Tecumseh Chamber of Commerce

For the past several years I have donated one piece of art to the Tecumseh Chamber of Commerce. I missed last year when I broke my ankle and had major surgery. This year I am donating this turquoise, teal and purple abstract design called, "Dreams of a Mermaid".
This design can be turned sideways and it is just as beautiful. My design will be part of a public auction to help raise money for the town of Tecumseh and put resources back into this small community. On May 10, 2010 this small town of 6,000 was in the path of a big tornado which drove through the SE side damaging three churches and one hundred homes.
Tecumseh, Ok. is also the official hometown of our current Oklahoma Governor, Ms. Mary Fallin.

Sunday, January 16, 2011

Glass Art Design in its new home.

Just as beautiful as I had imagined.
This window catches so much light in this location and colors are reflected throughout. For Diana and Victor, who are celebrating their 40th wedding anniversary this year - this home and the art represents a new chapter in their lives. The window helps to separate to living areas in their home.


Me and my new friends.


To Victor and Diana - Happy New Year to you both and God Bless!
Thank you for supporting my art journey and letting me create for you - Lynn


Hanging the Glass Art

Measuring the length of the chains. I choose a white chain with white hooks. Jim helped me hang the window design.


I kept looking at the glass design - checking all the small pieces to make sure there weren't any smudges.


Wednesday, January 12, 2011

Glass pieces laid within the space of each pane.

Still finding more photos about the process of this particular commission....so the pictures are a little out of sequence.


Doing this allowed me to see how the design was going to lay out in the overall piece. I had to consider that I was giving good balance within the nine different square designs. Like a quilter making a quilt.


A little more of a close up photo...

Don't know if this is more clear - the window is three feet tall and three feet wide. A biggie!

Finished - private commission....

One of my previous customers who had bought three glass designs (two were privately commissioned) for her children last year for Christmas said it was finally time for her to have a piece all of her own. She recently moved from the country into the city. Her new home in the city was a smaller traditional country home with a white interior. She wanted a partition to help separate her dining room from her living room. This old antique nine paned window will create some privacy between the two living spaces.

I took this glass and made her window above. I believe she will be thrilled. In this window
I had to create nine smaller window designs and because the window was being used as a partition, whatever detail I added to the front had to be added to the back. So in essence, this design had two window fronts where people could see.

What the glass pieces looked like before....

Finished product....but look below at what I started with.....
All of the flat sheets of glass I used.

These photos show all of the individual glass gems, squares and rectangles I also foiled and soldered to create the design. The colors the customer chose were green, teal, turquoise, gold, white and clear glass.


More glass....


and more....